Continuing work on the repair of a couple of tansu, each composed of two equal-sized halves, for the Boston Children’s Museum.
The new track is now installed in the main compartment:

The lower rail has been repaired from the gouging of the drawer floor nails, reinstalled and re-stained.
This shot shows it while the stain is drying:

One of the drawer sides had a massive split:

No shortage of nails on the near end, huh?
It seemed simplest to glued the crack and clamp it up:

Main compartment floor panel is back in place, with the mouse-chewed corners repaired:

That cabinet could then be set aside.
Onto the final cabinet half of the four:
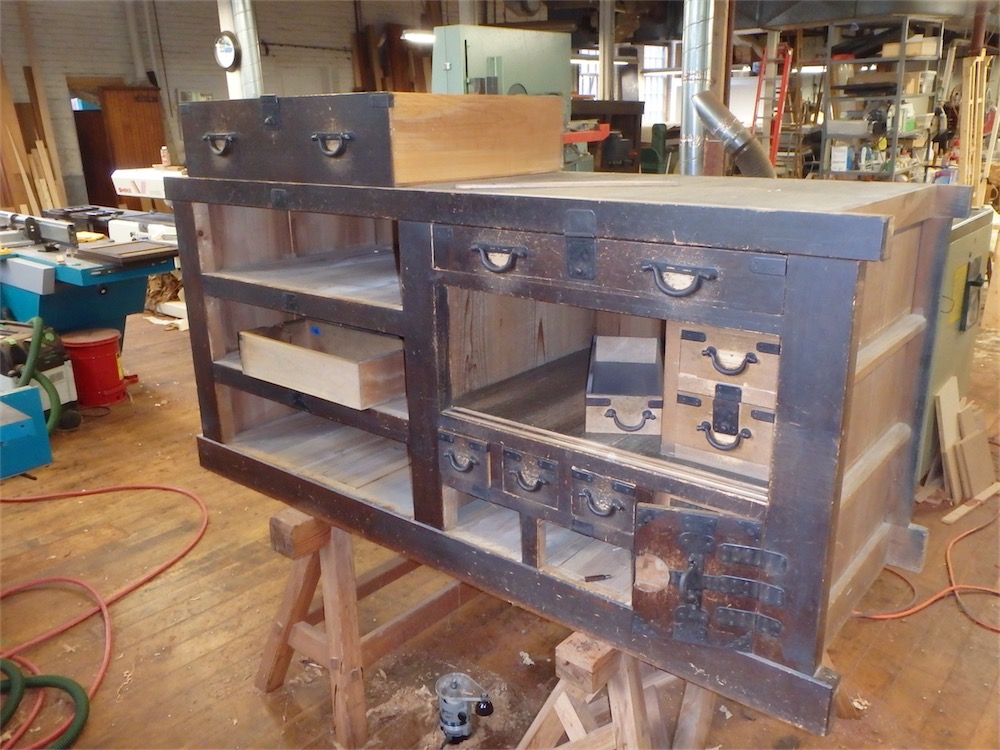
This one may not require sliding track surgery, though the sliding door lower tongues will need attention at a minimum.
The hinged door at the lower right, along with the two large drawers on the bottom left of the cabinet have been locked for the past 30 years or so, as the museum did not possess a key. I was able to remove the locks from the front fairly easily:

In the bottom right compartment, revealed were a pair of drawers, the lower of which also had a lock mounted:

Locked drawers contained within a locked compartment - interesting. I wonder what they used to keep in there?
The hinged door on that lower right compartment had some issues with its hinge leaves, so I removed them to flatten them atop an anvil. Here, I’m refitting the hinge pin:

After removing the upper hinge plate, also for the purpose of straightening the leaves, I noticed that the maker had made some errant mounting holes:

It’s interesting too that the finish appears to have been applied after the hardware was mounted, not prior. A lot of tedious work that must have been!
Rooting around in the back of the lower right compartment, I found some receipts and other paperwork:

I imagine the museum will be interested in taking a look at those.
Also found in the lower drawer of the lower right compartment was a bag of long coil springs::

Possibly these were parts for a weaving loom (?).
Once I had all the locks out and the cabinet fully opened up, I decided to have a go at fabricating a key. I went to a local hardware store and bought a old style key blank, which I then modified by drilling it out, and making further mods with file and grinder:

Trying it out:

It works:

There are three different size locks on this cabinet however, and they are all larger than the biggest available key blank I can buy locally, so I’ll have to see what else I can find online.
One of the differences in this cabinet from the other three is that the drawers are put together with kikugi, wooden nails, rather than metal ones:

Another view:

Overall, the kikugi seem to have held the drawers together over time better than the metal nails. Presumably, season movement does not cause nearly the same amount of nail withdrawal as seen with metal nails, and even if the kikugi do get drawn out, they are not going to wreak the same havoc as do metal nail heads.
However, it is perfectly possible to split a drawer floor panel with a wooden nail:

I removed the drawer lock from on of the hidden drawers and replaced on the drawer at front which was missing the lock:

Wooden nails do not always hold perfectly over time, as this hanging drawer floor shows:

On the bottom of this drawer was a massive gouge:

The culprit? Metal nails holding the compartment dust panels in place.
Here’s a couple poking out:

And another:

And another:

Should have these cabinets fixed up by the end of the week, at which time I’ll return to work on the ‘Ming Inspired Cabinet’ series. I’ll post one more in this thread in the near future.
Thanks for visiting the Carpentry Way.
via Tumblr http://davidpires578.tumblr.com/post/151075173589
No comments:
Post a Comment