Post 12 in a continuing series.
I obtained a Zimmermann pattern mill for a variety of reasons, and recently I was able to use it to actually make a pattern. Who woulda think it?
The mill proved to be very good for such things, unsurprisingly. The pattern was for the leveler foot, which will be cast in silicon bronze:

I was entertaining the idea of doing the casting myself, but time is a harsh mistress and I have decided that it makes more sense to sub this work out. The foundry told me to allow 1.5% for shrinkage, and to allow 1~2˚ for draft so that the pattern could be easily removed from the mold. I added material for shrinkage, and then a bit on top of that, using calculation.
The taper for draft, which I set at what I imagined was a happy middle ground of 1.5˚ would be a little tricky to make otherwise, but the fact that the mill head can be easily tilted and made the job a breeze:

Perhaps this picture, with the edge of the foot pulled tight to the try square, shows the 1.5˚ taper a bit better:

I shipped the pattern off to the foundry and they should have it in hand by now. I think that they will be doing some silicon bronze casting in the near future, so I hope to have the parts back within a week or two.
After milling, I had this stack of parts set aside:

The second tier of sticks from the top in the above picture is the stock for the pillow blocks, and I made the decision to start joinery fabrication with those pieces.
A number of hacking chopping and blitzkrieg-like steps followed, resulting the following pile of rough-cut pieces:

In last year’s ‘Square Deal’ tables, I worked on the half laps joints for those pillow blocks using a cobbled-together MDF fixture and a router. It took a while to build the jig and then calibrate it for use. The results were acceptable, but it was not the most efficient process.
This time, I dispensed with the nasty MDF and made use of my Zimmermann, which was a lot faster and more accurate:

Part of the advantage to using a mill is the inherently greater rigidity of clamping, and the equally rigid quill and spindle.
Not only the lap seats but the side abutments could be conveniently processed, ganged up, to high accuracy:

Coming off the milling machine, I had the half laps at the point of starting together on all eight pillow block pairings:

A closer look at one pair with the half laps started at a corner:

Another view:

The half-lap portions of this joint are not a great technical challenge. The mitered abutments, on the other hand, are another matter.
A few steps further along, the pillow blocks now have their mitered abutments to the point where the connections will start to assemble:

Here’s one of those pairs, set 'H’:
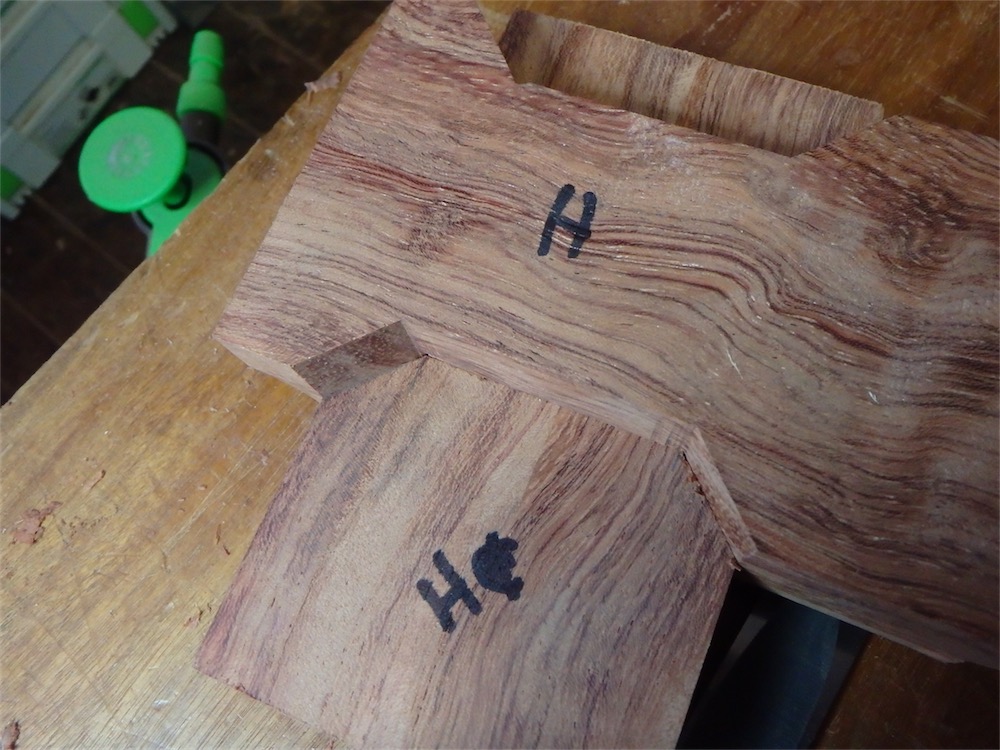
The underside of the same pair:

These joints more typically slide together until the half lap walls started to meet, at which point further fettling would be required.
Set 'C’ went together slightly further after a bit of bludgeoning:
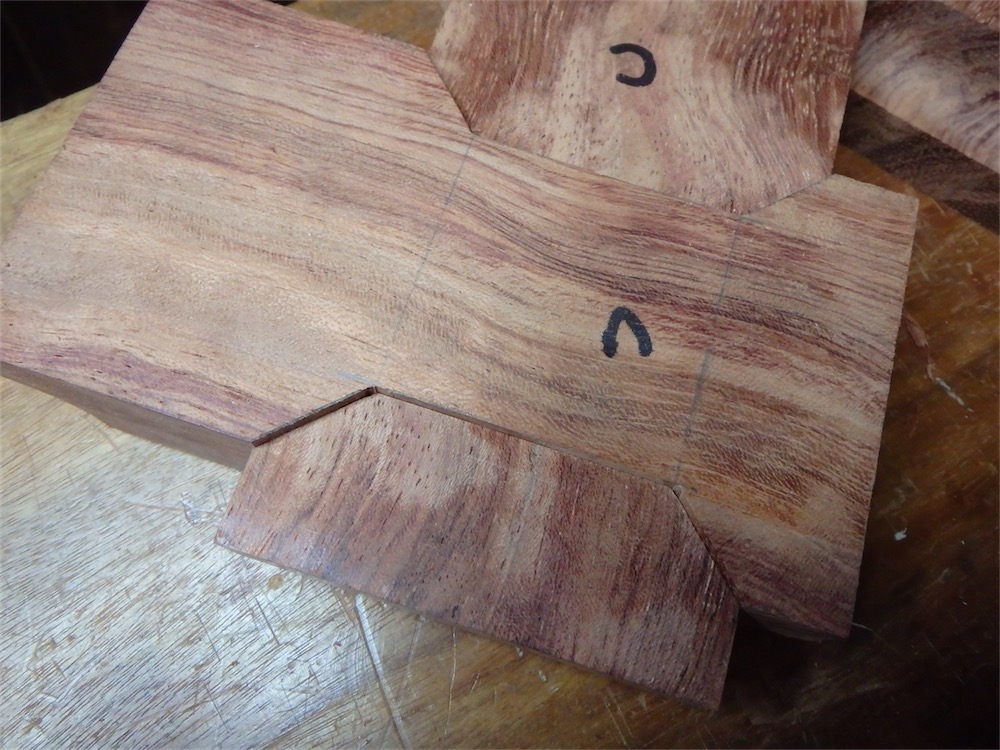
Another view:

At this juncture, the pillow blocks have also been coved longitudinally:

Set 'A’ nearly together:

Fitted a while later with a few modest taps with a rubber dead-blow mallet:

The underside of the same pair:

Set 'B’ also to the same stage:

Under side of set 'B’:
One of the checks I do when fitting is to flip one of the parts upside down and check the lap fit thusly:

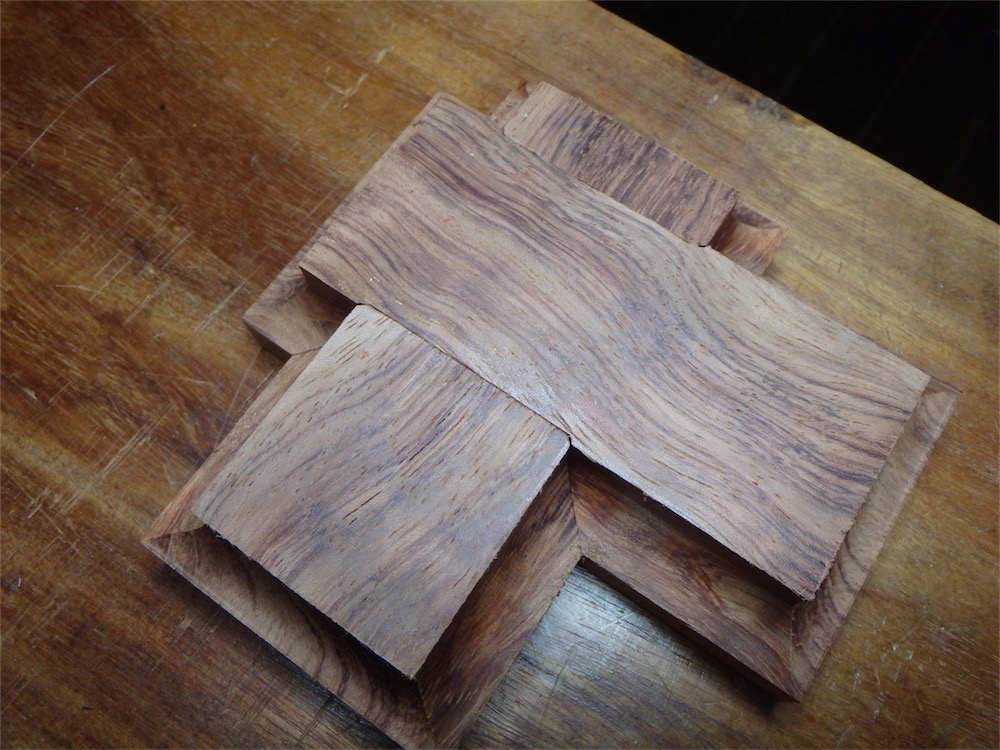
A while later, all 8 sets were together:

I was pleased with the results. I think I could get the joints even more perfect, as I have realized that there were several junctures along the way where cut out accuracy could have been a little better yet. One can never be fully satisfied. I’m still learning the ropes with the milling machine, so the next time I make use of these pillow blocks in a project I will be able to refine the process on mitered half laps a little more, or so I hope.
When I was halfway through the pillow block work, a couple of custom-made saw blades finally arrived. Would my English friends call them 'bespoke’ I wonder? Well, let me tell you, they 'be-sharp’!
I ordered a 14" rip and 14" cross cut with 100 teeth from Carbide Processors out of Washington State, who make some special-order blades with Cermet II teeth, supposed to outlast carbide by a significant margin – 200% ~1150% greater run life - and yet are readily sharpenable like carbide. So far I am really liking the cross cut blade. Haven’t had a chance to try the rip yet.
Glad to have a blade now which can execute clean cross cuts with the Wadkin. The less than impressive Atkinson Walker blade, provided by an English company called Snot and Sturgeon with the saw, can decorate the shop wall for the foreseeable future. That blade provided clean cutting for, uh, no time whatsoever.
All for today. Onward and upward. Will start in on the main support beams in the lower stand, which also make use of mitered half laps. Another kick at the can awaits.
via Tumblr http://davidpires578.tumblr.com/post/134499519194
No comments:
Post a Comment